By Jayden Kang
This is a question I am frequently asked when bird watching. Not how many species I have seen, or where I usually go to bird watch. Cameras are very important tools for birdwatchers. Some seek to verify the identity or collect a database of the birds they have seen, while others aim to see the birds in a new stunning light through the art of wildlife photography.
Summary of camera types
| Camera Type | Price | Portability | Imaging Proficiency |
Does it suit my needs? |
|---|---|---|---|---|
DSLR
|
Recommended if you are keen to take high-quality photos of birds, or photos in challenging lighting conditions. | |||
Mirrorless
|
Recommended if you are keen to take high-quality photos of birds, or photos in challenging lighting conditions. | |||
Bridge Camera
|
Recommended if your main aim is to capture mid- to high-quality photos of birds, or record shots of faraway birds encountered. | |||
Digicam
|
Recommended if your main aim is to simply document the birds encountered, but far birds will be difficult to photograph. | |||
Adaptor for Binoculars/Scopes
|
Recommended if you mostly don’t take photographs, but aim to document the birds encountered. However the birds must generally be stationary for them to be photographable. |
What do you need, exactly?
“In this economy!?”
Cameras have always been expensive; a mid-range set of camera equipment can cost as much as 20% of a BTO down payment! It is no surprise that many people buy their camera gear second hand to save costs. The good news is that there are plenty of people selling used camera gear after upgrading theirs, and a good proportion of these cameras have either only seen birds, weddings, events, or the dark innards of a dry cabinet.
But even then, the camera you truly need might not even cost so much! Do you wish to simply document the birds you encounter, or do you want to explore portraying wildlife in your own style? Even wildlife photography might not require high-resolution cameras, unless you want incredibly close-up images of birds, or want to print your images large (like cover-your-room’s-wall large!). Choosing the perfect fit for your needs might seem difficult, so here are some considerations on how to find what you need.
Types of cameras
There are many kinds of cameras, and when specifically talking about cameras used for bird photography, Interchangeable Lens Cameras and Bridge cameras come to mind.
Interchangeable Lens Cameras come in two flavours – Digital Single Lens Reflex (DSLRs) and Mirrorless cameras. On these cameras, you can change the lens of the cameras to suit your needs. Want to take some streetscape pictures? Put on a short lens with a wide field of view. Want to focus on bird photography? Attach a lens that is long enough for your needs (a focal length of at least 300mm is generally recommended for bird photography). This versatility also means that you will need to purchase both a camera body and a compatible camera lens (they need to have the same lens mount). Interchangeable Lens Cameras are future proof as you can upgrade either camera body or lens, and still can use the other!. DSLRs cameras are slightly older than mirrorless cameras, and the latter is more compact, but both are recommended if you are hoping to capture high-quality images of birds.
Bridge cameras are cheaper and usually cost around $1000 +/- $400, and the lenses are integrated into the camera body itself. This means that bridge cameras are incredibly compact despite having long focal lengths (the longer your focal length, the more zoom you have). But as they don’t get as much attention as other mainstream cameras, they usually have outdated image sensors or hardware that is limited in their capabilities. Having said that, some bridge cameras can produce better results than entry-level DSLRs and Mirrorless cameras, so don’t underestimate their capability!
A little bit more about the cameras’ histories

Common Kingfisher. Photo credit: Keita Sin. Shot on: Pentax K-30 + Pentax 55-300mm f4.0-5.8
DSLRs have evolved from the film SLRs of the 1990s, and thus have two mirrors, one to reflect an image down to an autofocus chip, and another to reflect an image up to the viewfinder so you can position the bird in your image. Over many years, the mirror can start to loosen up from use and focusing errors can occur, and calibration of the camera must be done for sharp images.
Mirrorless cameras simply threw the concept of mirrors out the window, and now there are less things to worry about breaking. Mirrorless cameras can have subject tracking capabilities, but they aren’t necessary in nailing a shot, they just make certain shooting situations easier, like shooting kingfisher dives.
A third option, now more expensive thanks to the hype of the “digicam” boom on social media, point-and-shoot cameras are also available. From water-resistant to far-zooming, point-and-shoots come in a wide array of flavours and cost nowhere near as much as the previous options, but are the most limited in terms of wildlife photography capabilities.
Size and weight
Camera bodies are light, but lenses are heavy. Solid glass is no joke, and carrying 2 or even 3 kilograms of camera when hiking can ruin the fun. It is like carrying around two dictionaries, or all your TYS exam books simultaneously, for the whole day.
Having the flagship of flagships in your hands might still hinder your wildlife photography journey if you hate bringing it out of the house. Always buy a camera you’d love to hold, not one that captures the nicest of images. Bringing a camera out to take decent shots is better than leaving your camera at home. If weight is a huge restriction for you, a bridge camera might be a better option than DSLRs and Mirrorless cameras.
Durability
Most mid-range to high-end cameras produced would have “weather sealing” built into it, but rarely are they ever officially rated! My Olympus E-M1X has an IPX1 rating, which is not commonly seen on cameras, but also is the lowest water-resistance rating. That said, only use your cameras in the rain if you feel comfortable to do so!
Camera specifications to think about
This is the trickiest part, as it is immensely subjective and is THE topic of countless camera debates in online forums. Many people have different needs, so a person who photographs wildlife as a means of income needs a different camera than a hobbyist wishing to collect photos of their bird sightings.
Resolution
Many see this as the biggest or most meaningful camera specification when buying a camera. In 2025, there are now very expensive cameras that have 100 million pixels (megapixels or MP), but most cameras are within the 16MP to 24MP range. The higher the number, the more details you can pack into your photograph.
But do take note, the amount of details the camera sees is also dependent on how sharp the lens is, so take that into account when buying your lens and camera, and allocating budgets. It is easier to crop an image than to carry around a larger telephoto lens. But this would not work if your lens is a little soft.
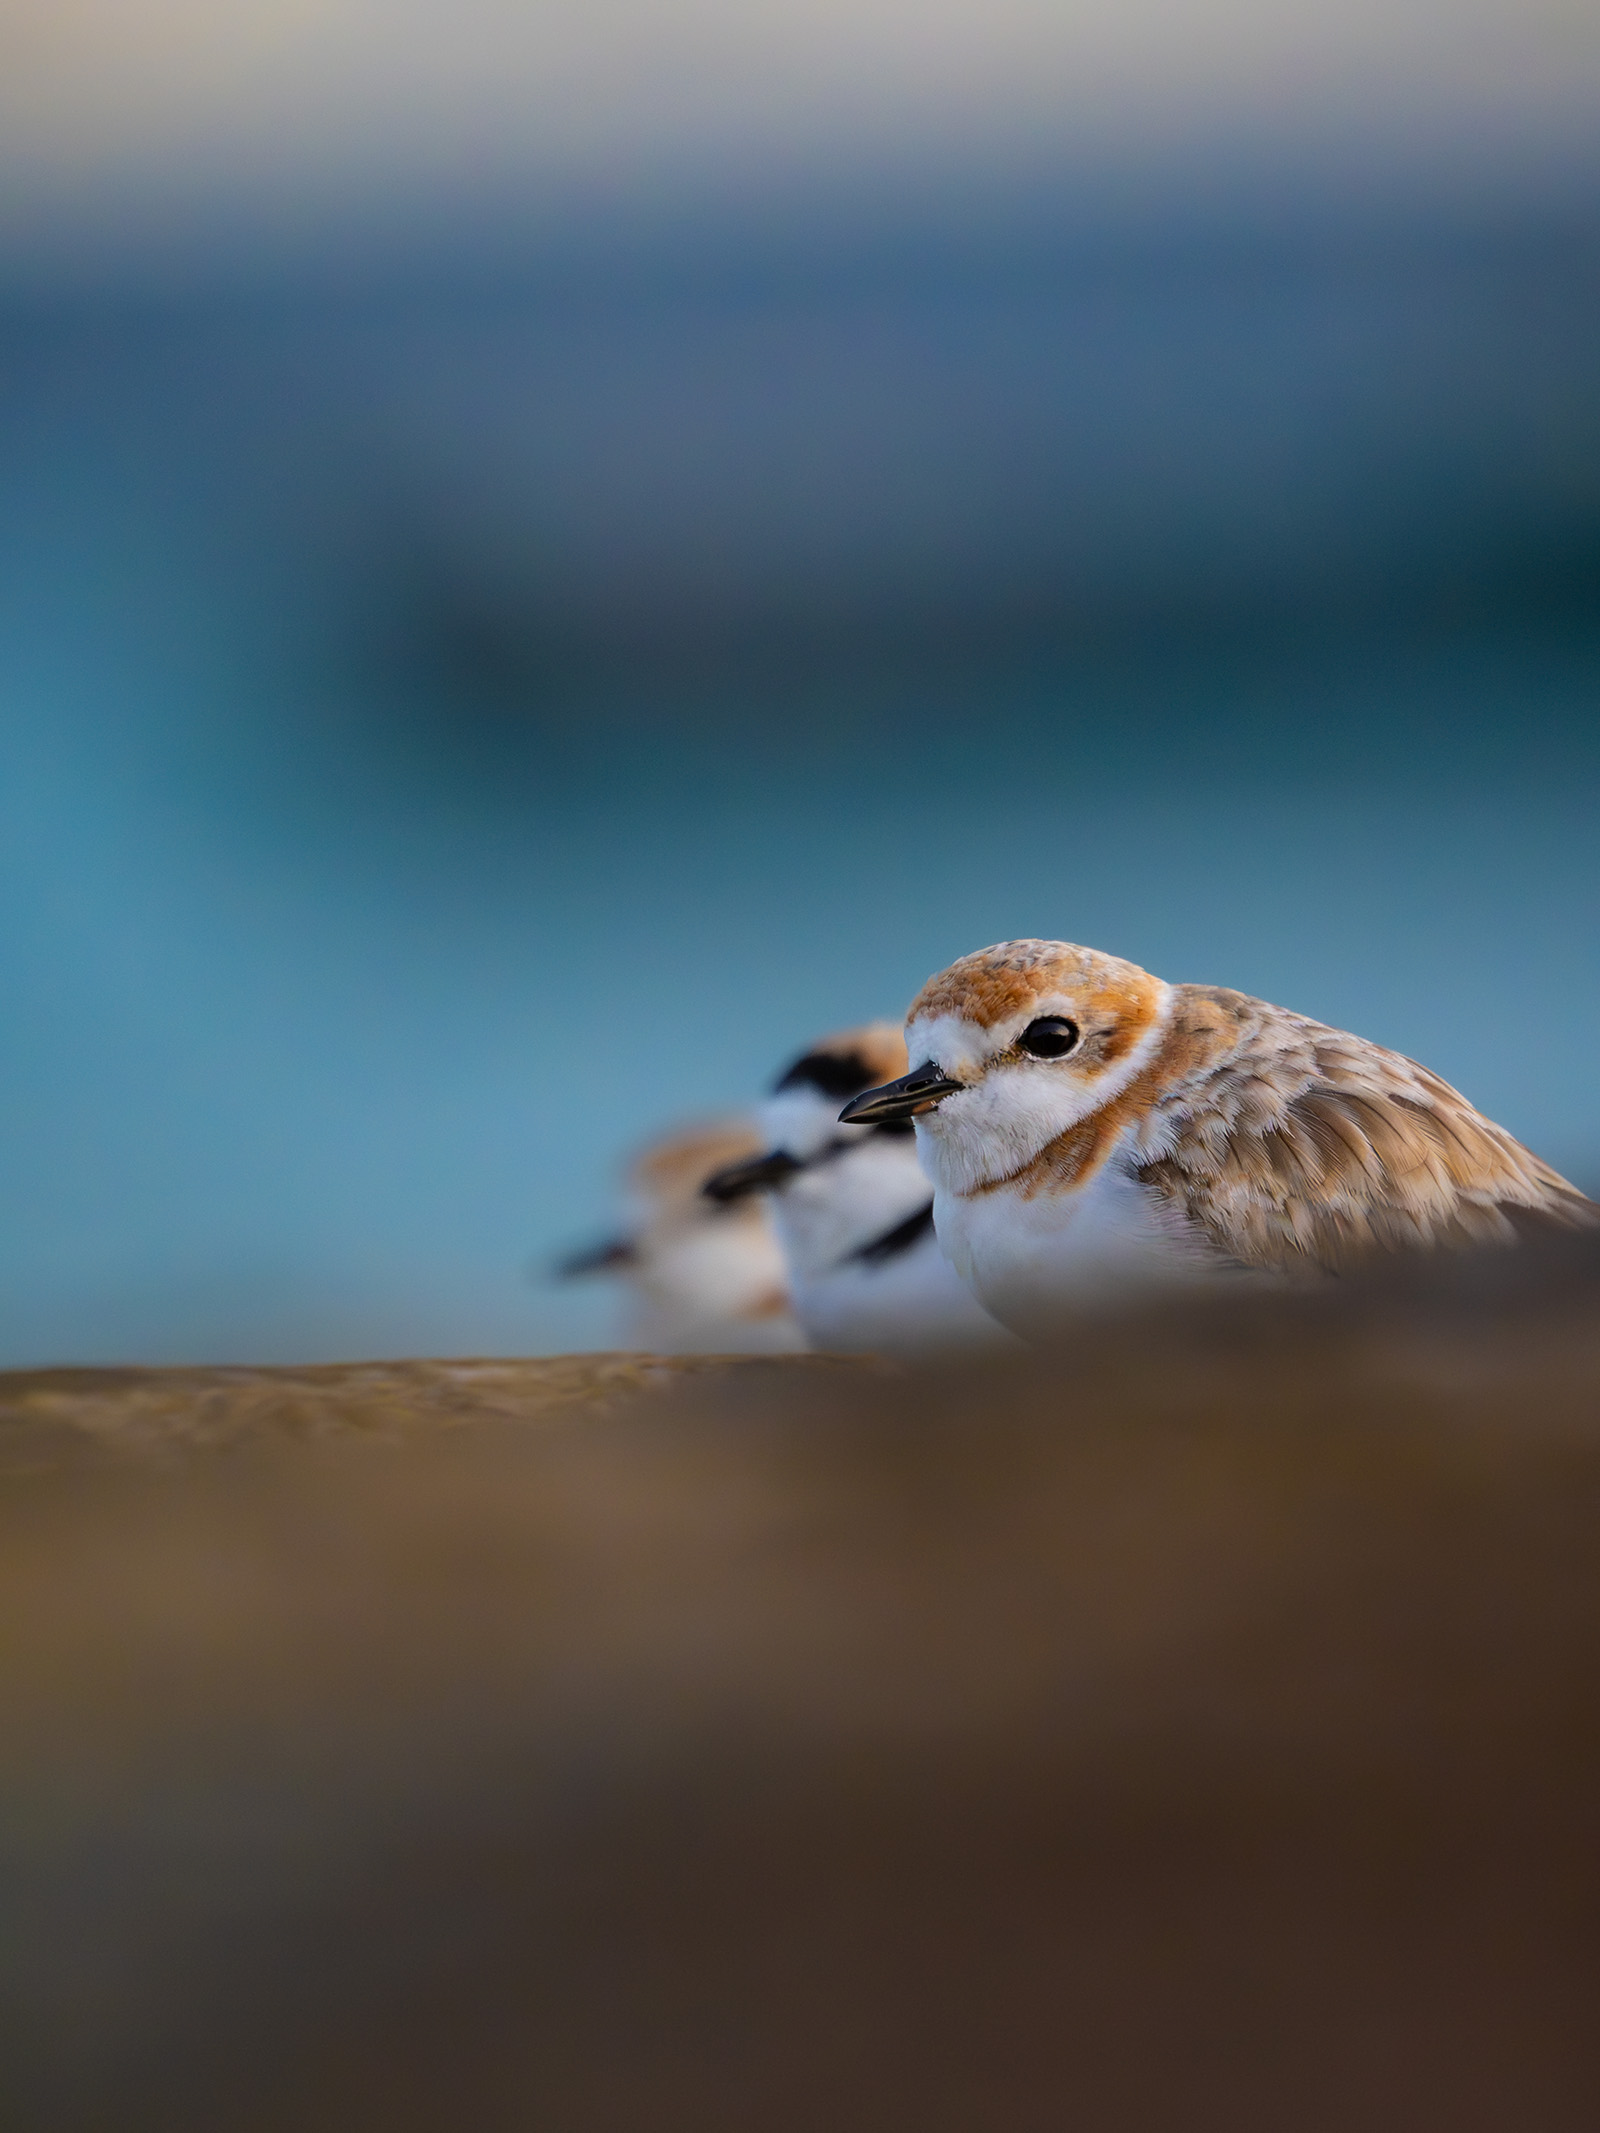
Malaysian Plover. Photo credit: Jayden Kang. Shot on: Olympus E-M1X + Olympus 100-400mm f5.0-6.3 IS
Although I had to crop this image quite a lot, I have printed an A1-sized poster of the above image of Malaysian Plovers at 70 pixels per inch, with just 20 Megapixels, and it has turned out perfectly fine.
Autofocus speed
Birds are fast when they fly! If you ever are interested in capturing images of them flying, you have to get a fast camera, or be fast enough to manually focus accurately.
Having a gear with fast autofocus speed is useful if you wish to capture birds-in-flight (BIF) photos, where countless split-second adjustments must be made at inhuman rates. Situations like kingfisher dives, or erratic flight patterns of swallows would require fast and accurate autofocus as the human brain simply cannot keep up with focusing at such speeds. Generally, DSLRs and Mirrorless cameras outperform Bridge cameras in this aspect.
Here is a photo of a House Swift that I managed to photograph thanks to my camera’s autofocus. I don’t think I would have been able to capture this fleeting moment if I had to manually try to get the shot sharp!
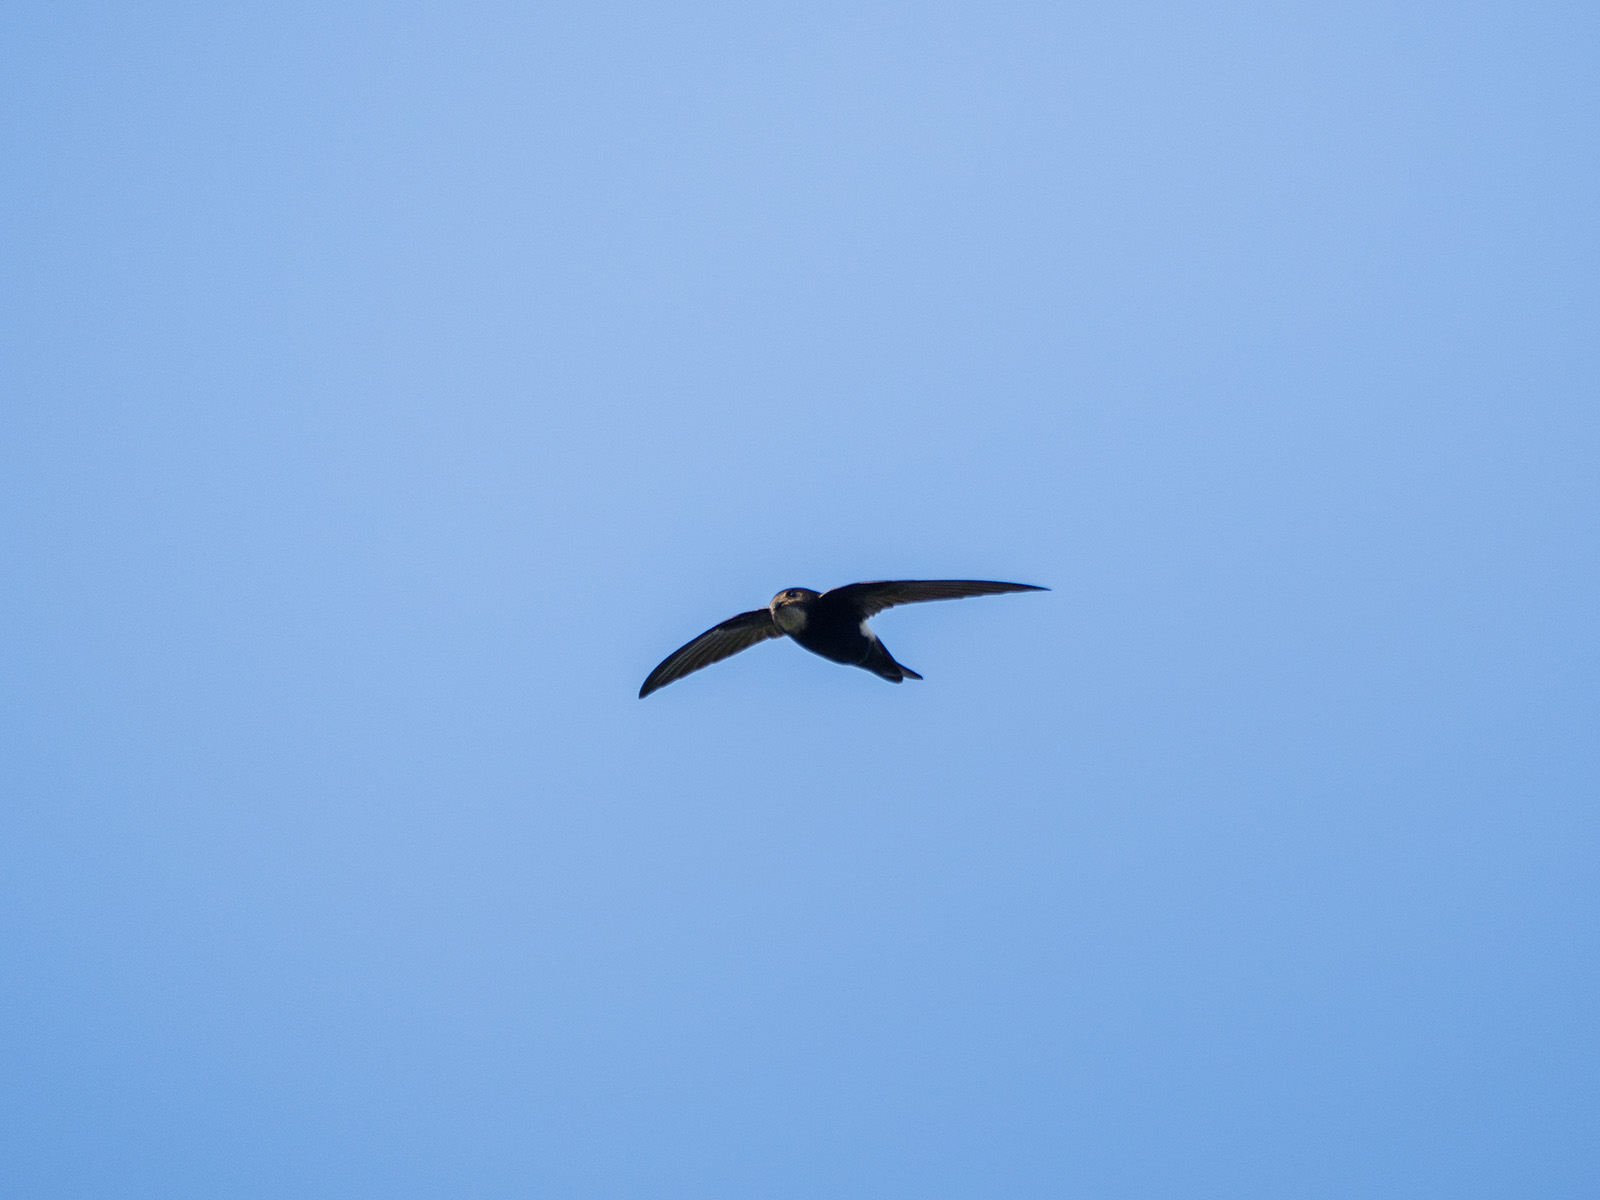
House Swift. Photo credit: Jayden Kang. Shot on: Olympus E-M1X + Olympus 100-400mm f5-6.3
This shot of a Black-naped Tern skimming the water surface was shot with full autofocus. They were hunting at the Loyang Rocks, and I was quite unprepared to see one hunt so close to our boat.
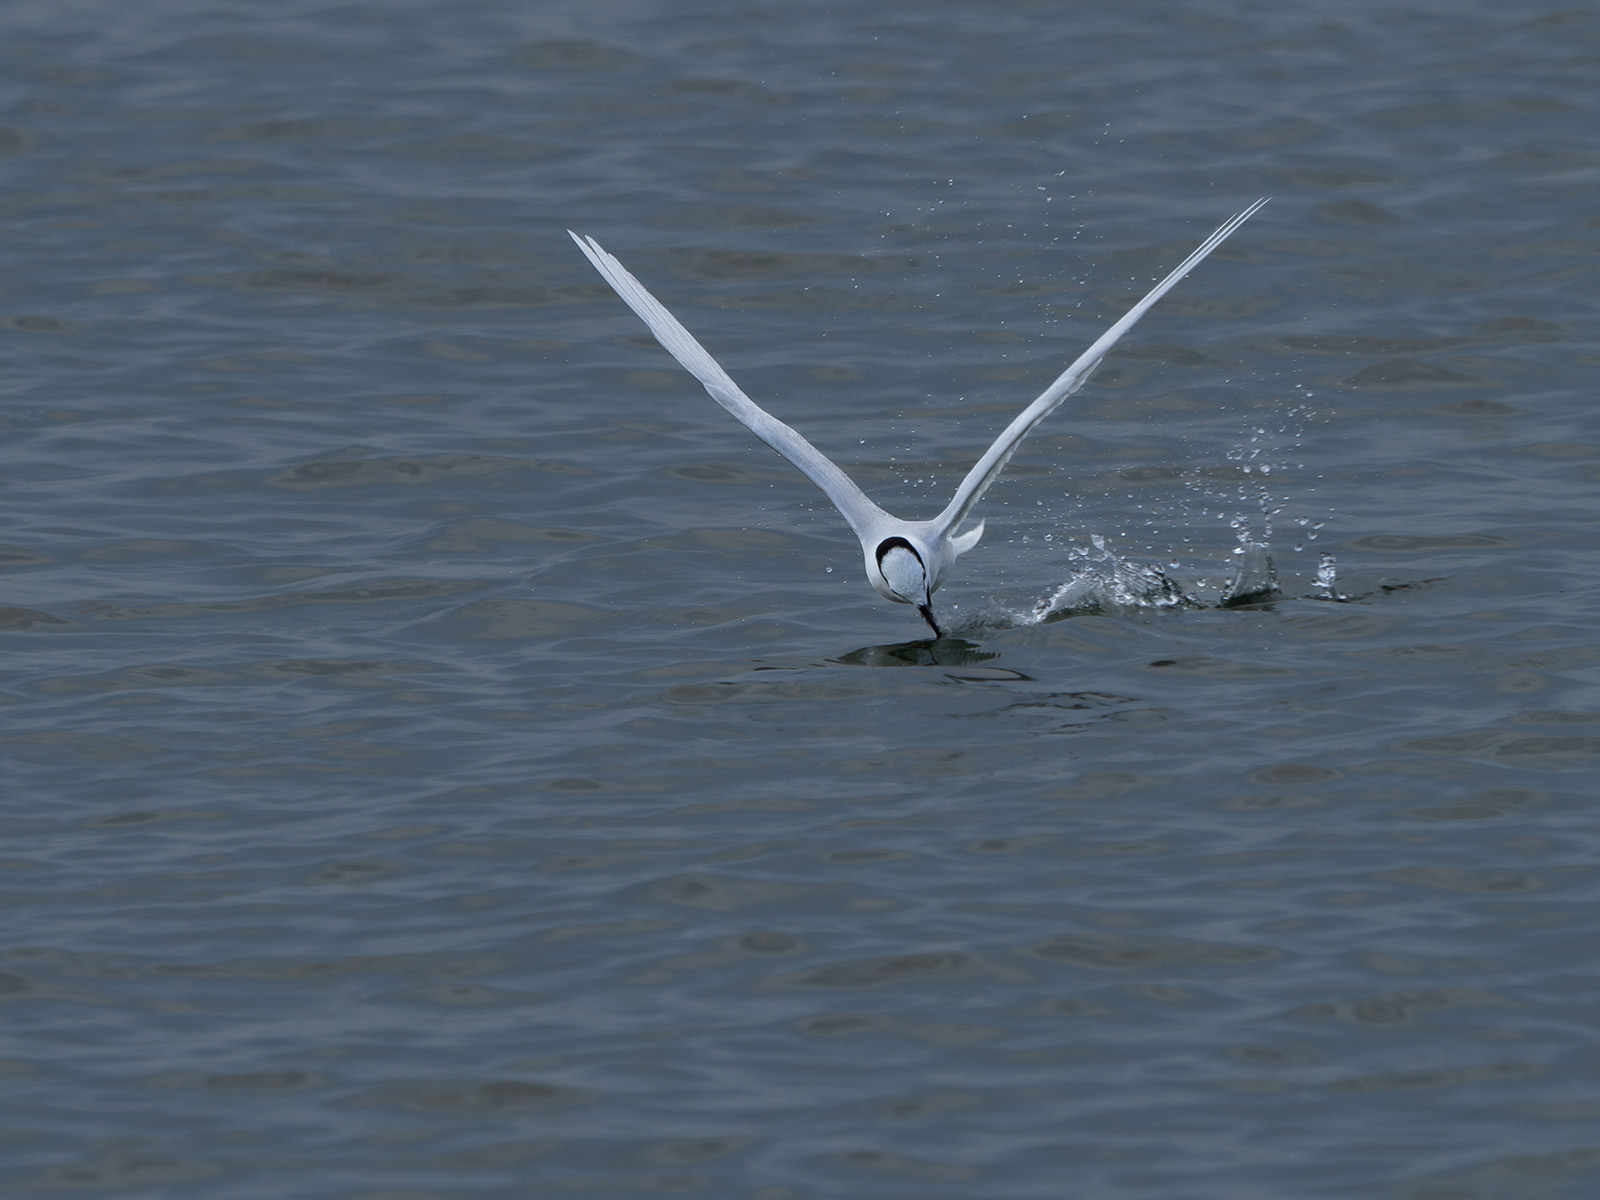
Black-naped Tern. Photo credit: Jayden Kang. Shot on: Olympus E-M-X + Olympus 100-400mm f5-6.3
The Barn Swallows were hunting in a huge flock, and the chaos was very confusing for my camera. However, the fast autofocus meant that once I tracked a single subject for a split second to allow for focus acquisition, photos like this could be captured.
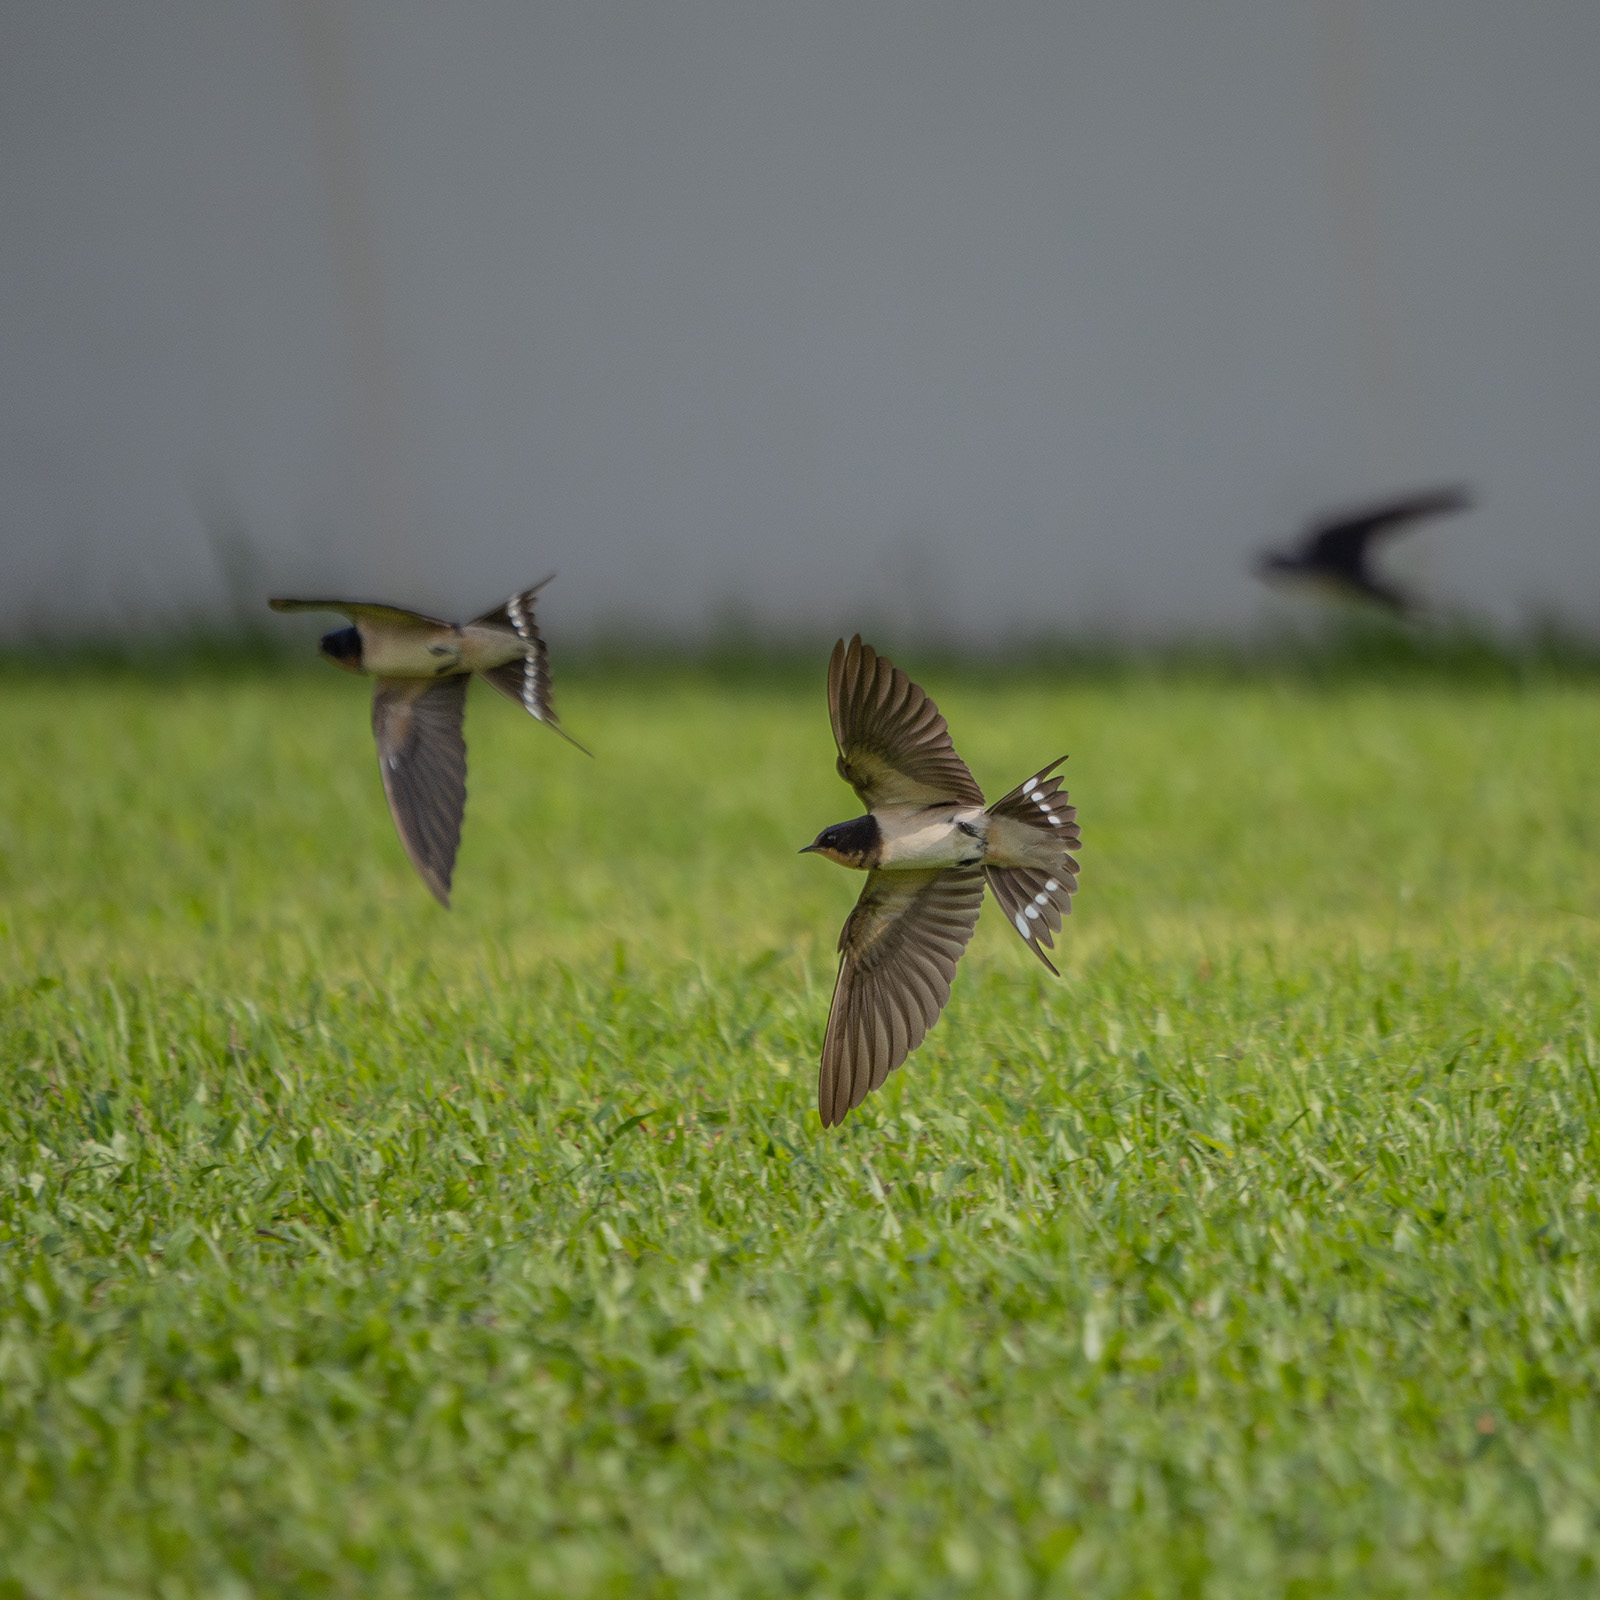
Barn Swallow. Photo credit: Jayden Kang. Shot on: Olympus E-M1X + Olympus 100-400mm f5-6.3
Lens apertures
Aperture numbers are derived from a ratio of the lens’ focal length divided by the lens’ optical diameter. The smaller the number, the larger the size of the aperture (= more light going through the lens), and generally speaking, the better (and more expensive) the lens gets.
The understorey of forests are very dark. If you are going to compromise and settle for a lower-end camera body, but want to capture images of babblers, then you need a bright lens (= small aperture)! But typically, the longer your lens’ focal length, the smaller your lens’ maximum aperture gets, so settle on a balance for reach and brightness that you need.
Lens focal length
Wildlife are usually skittish, and are often observed at a distance. Having a lens of a focal length of at least 300mm (full frame equivalent) would be the rough minimum requirement for bird photography. The longer the focal length, the bigger the bird in the image (but also the bigger the lens becomes)!
Ultra-telephoto lenses like 600mm or 800mm lenses can be immensely heavy and costly, and you might require a tripod to accompany your camera gear to avoid getting shaky images. That is why focal length is always a compromise between three factors – price, portability, and how big the bird needs to be in your images.
Low light image quality
If you settle on using a lens with lower aperture and longer focal length, then you need to have a camera that can capture detailed images even in low light. This can be determined by looking at how well a camera performs at high ISO. The higher the ISO, the more sensitive the sensor is to light, and thus the image captured can be brighter even if the physical amount of light did not change. But, this also means that the image sensor is more sensitive to signal noise, which starts to replace detail in your image!
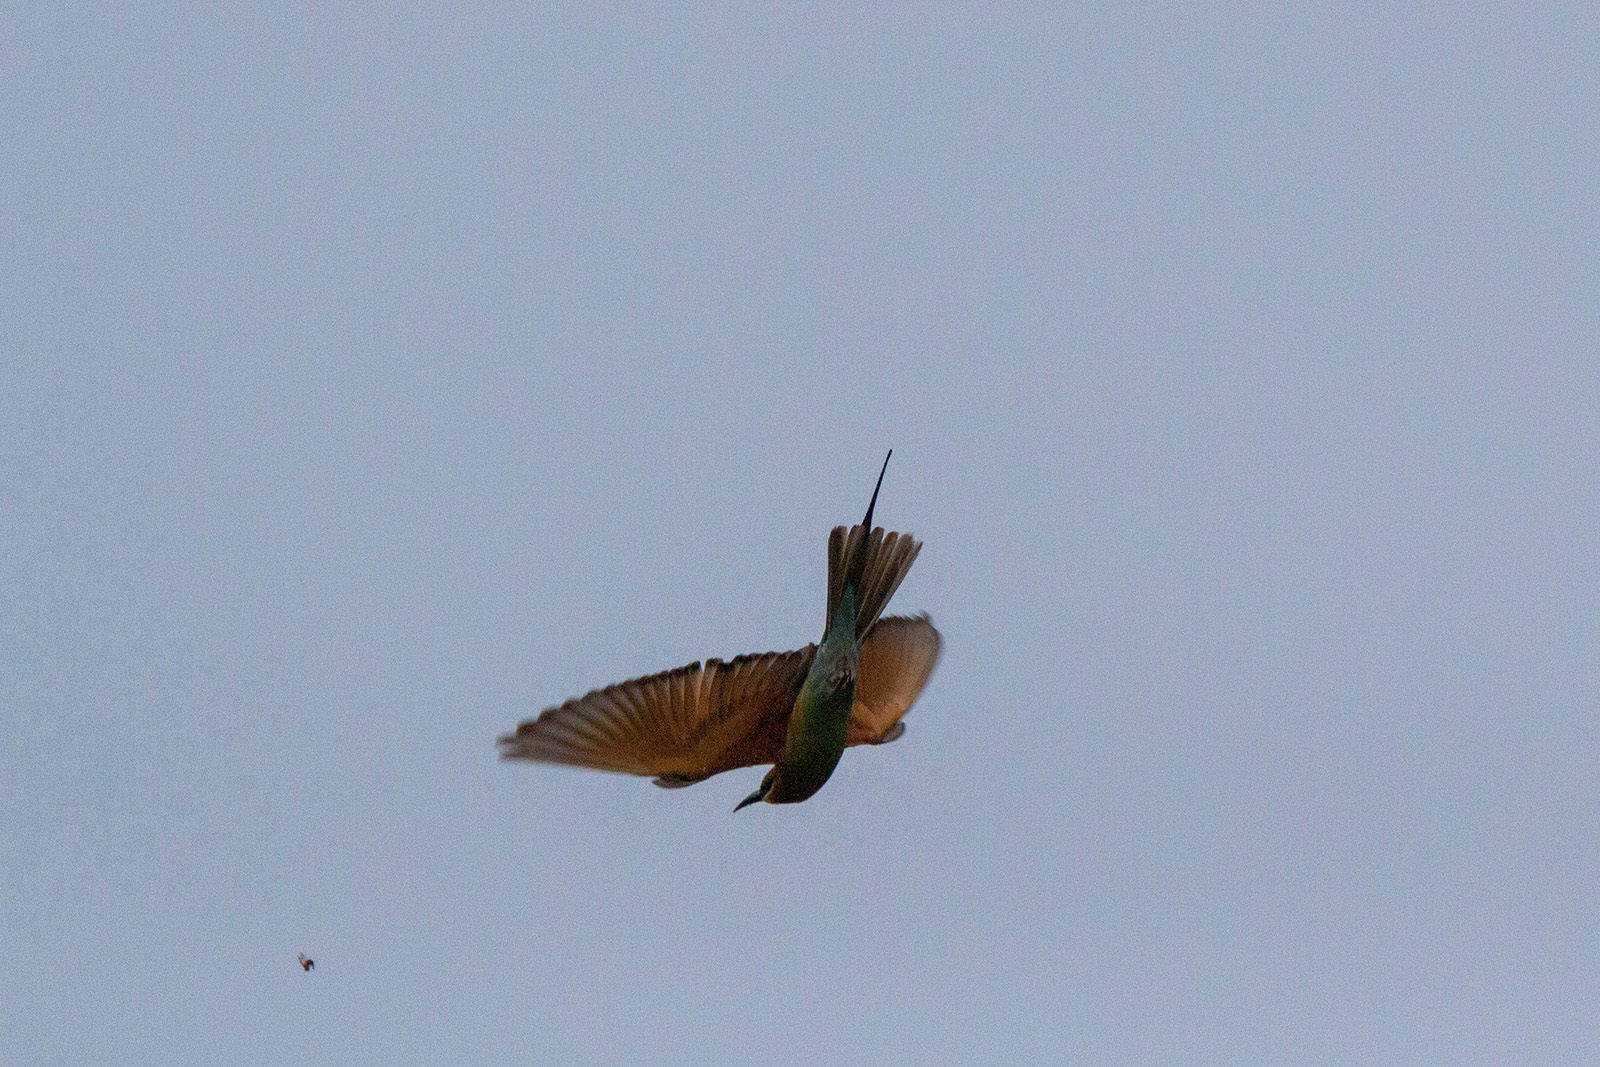
The Sony a9 is regarded as one of the better cameras, in terms of noise management in high ISO images.
Blue-tailed Bee-eater. Photo credit: Glen Sim. Shot on: Sony a9 + Sony 200-600mm f5-6.3 G (ISO 10000 and cropped 4x)
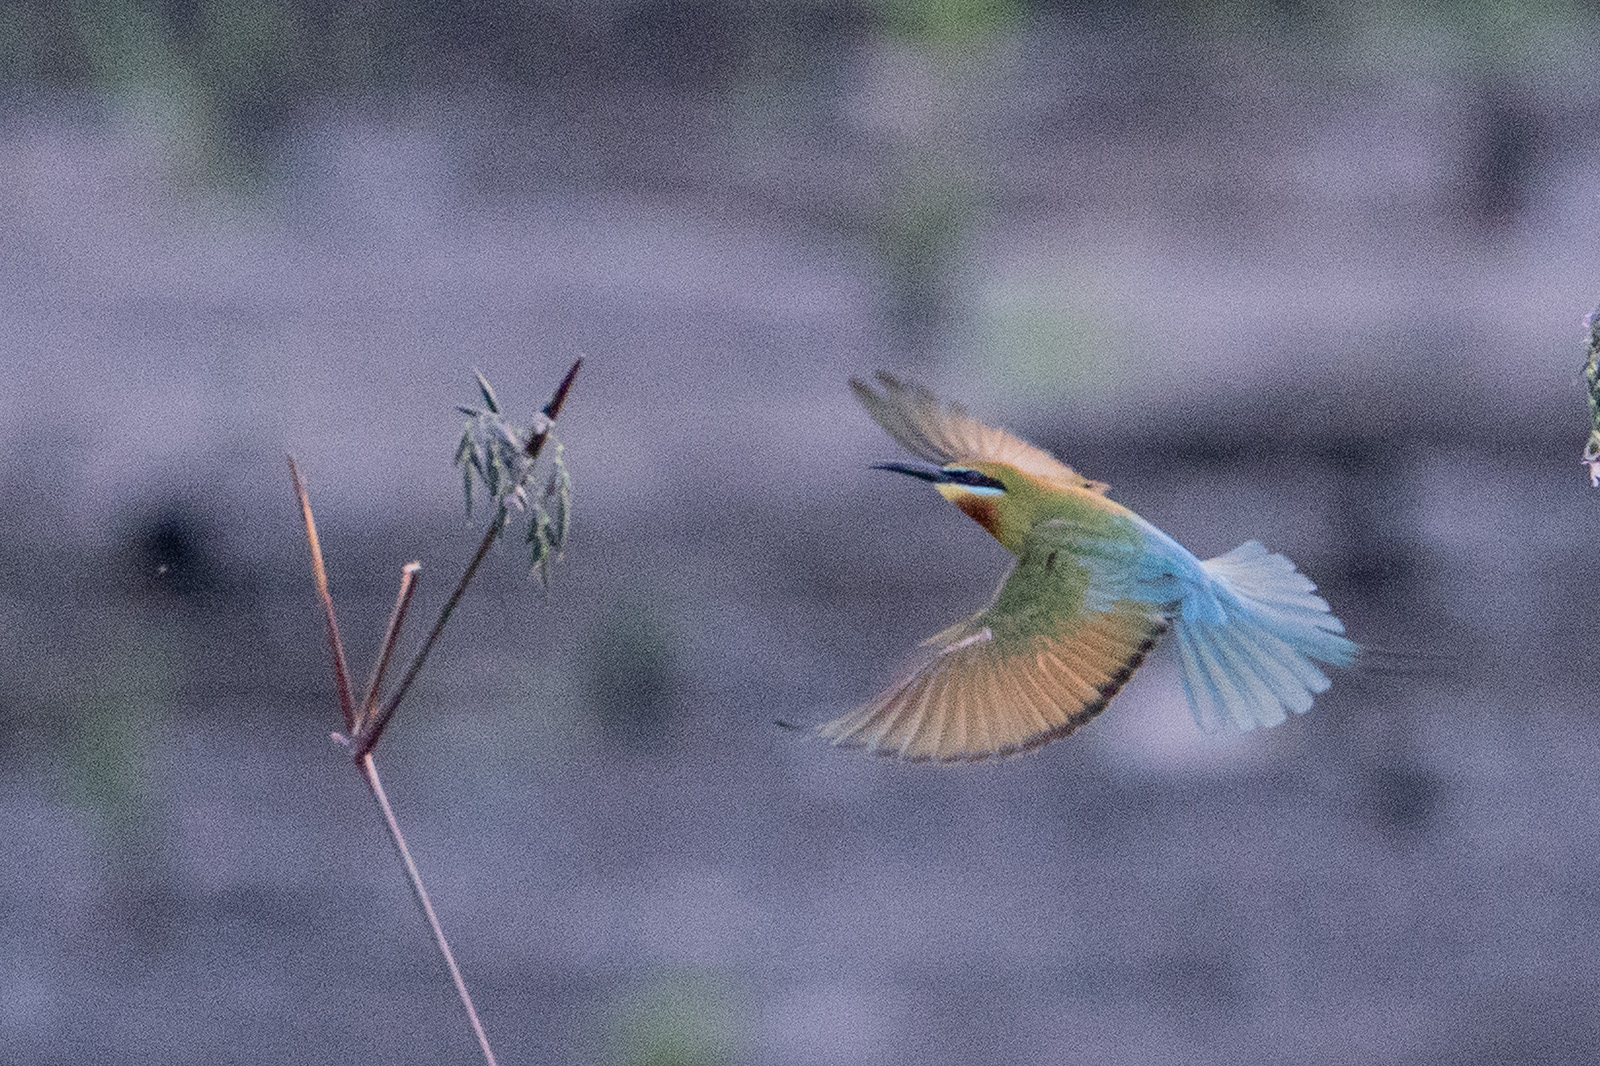
In the Blue-tailed Bee-eater photo, it is evident that the Canon 650D is struggling at ISO 6400 (notice the “noise” on the bird?), but the bird can still be identified based on its plumage features. Pricier cameras are able to tolerate less noise at high ISO speeds. On the other hand, some cameras are incredibly weak when battling signal noise at high ISOs, and the identifying features of the bird you photographed might no longer be visible (colour, streaks, any patterns, etc.). If you foresee yourself spending time photographing birds in dark conditions (like the forests in Southeast Asia) you might want to invest in a camera that can tolerate high noise. You’d also want to try to get a lens that is brighter.
Having said that, the presence of noise in my Blue-tailed Bee-eater photo does not ruin the image for me! However, this is a subjective matter that is up to your artistic style.
Some cameras have an Expanded or Extended ISO setting where it uses software to push the limits of the sensor further than what it is normally capable of. However, it severely degrades the image quality and should only be used as a last resort. (For example, shooting in the understorey of dense forests before 9:00 a.m.)
Blue-tailed Bee-eater. Photo credit: Jayden Kang. Shot on: Canon 650D + Tamron 150-600mm f5.0-6.3 G2 (ISO 6400, cropped 2x)
Extra points for consideration: what software do you need?
If you are only shooting images in JPEG (a compressed file format), then the basic photo softwares in most computers will be sufficient for you. However, if you intend to take photos in RAW (the file format that contains much more information than JPEG), then you might require specific softwares to your camera body. Most camera manufacturers produce their own basic editing software, like OM Workspace for Olympus / OM System cameras, or Digital Photo Professional (DPP) for Canon cameras. You can also subscribe to software suites such as Adobe Creative Cloud. (Most bird photographers take their photographs in RAW so that the images can be digitally processed later. For example, if you take a picture in JPEG, you might not be able to salvage a picture if it was too dark when photographed. However, if you took the same image with the RAW format, you might still be able to brighten it digitally afterwards and still get details out of the picture!)
Some problems that cameras can’t solve
Atmospheric distortion
Singapore is HOT. It is almost impossible to get a shot of a raptor flying in the sky without atmospheric heat distortion spoiling the details of the patterns of its feathers. Even a perfectly sharp lens would not fix this issue.
Overbearing expectations
I would estimate that the ratio of user skill, to camera capability required, and luck, would be 60 : 20 : 20.
60% of the work needs to be done by the photographer, and 20% of the work left is just to obtain focus, meter the shot to the correct exposure, and capture the image when needed. The remaining 20% is luck, because the bird might move too much during photo taking, or simply jump away!
A photographer needs to track the birds, and know what situations would mean they are low and easy to photograph. For example, Red-crowned Barbets often call out of view, and Short-tailed Babblers only stick to dense understoreys. After spotting a potentially good photo, the photographer must find the bird in their viewfinder quick enough, adjust the exposure if the bird is too dark or bright, manually adjust the focus if the conditions are too dim, and ensure that your ISO, aperture, or shutter speed is not too unreasonable!
Every camera is good in bright conditions. It is only in understorey or crepuscular conditions where lower-end cameras start to struggle. However, it is still possible to capture good photos then!
Does it sound like plenty of work? Yes, it is! Good composition, backgrounds, and poses of the birds triumph the technological marvel you lug around for a birding trip.
Bad settings
Bad settings can cripple even the best of cameras. As a general rule, a higher ISO = brighter photo, lower shutter speed = brighter photo but more motion blur… Personally, I refrain from using guides as they simply tell you to copy their settings, and they might have a different shooting style from you! Tailor your camera to your needs, not to those of others.
In a dark environment, you can either use a lower shutter speed, or a higher ISO. The former increases the risk of motion blur ruining the image, and the latter reduces general detail as more noise is introduced. Both have a risk of clouding identifying features of birds. But, if you have still hands and the bird is still, use a lower shutter speed!
Poor maintenance
Lastly, having an expensive or cheap camera set-up doesn’t matter if your lens is still dirty, or if mould grows in your camera! A lasting investment is a dry cabinet, which would keep your equipment mold-free. Mold or dirty lenses can really spoil your images, especially in back-lit situations.
Always wipe your lenses and glass with lens wipes, not the common wet wipes or a dry microfiber cloth.
Conclusion
Everyone has different needs, and that is why there are sooooo many camera models out there! Take a slow glance at everything and see what is needed to fulfill your needs. Borrow a camera from friends or family if you can, as it gives you something to compare with other camera models.
Every camera model has a place in the market because someone would buy them. Don’t get lost within the harsh criticisms of cameras as seen online, because they might have a different use for the cameras, which might not apply well.